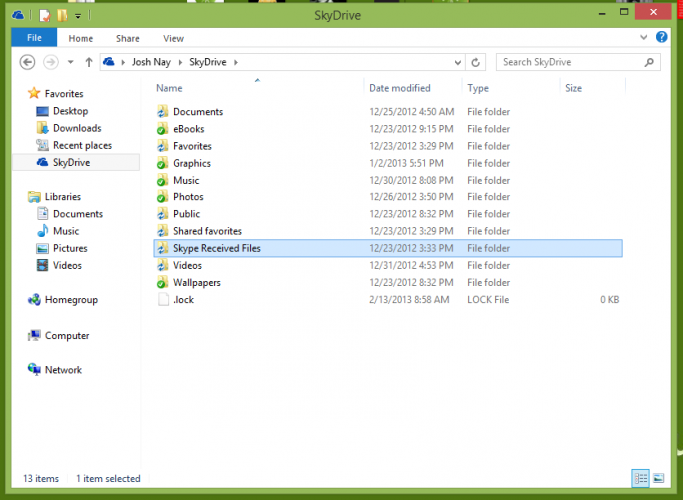
Changing the folder in which your Skype photos and other received files are saved is actually quite simple, though it does require a few steps and a bit of a look through the advanced options of the desktop app. It’s beneficial to change this folder especially when you’re using the program in conjunction with Microsoft’s SkyDrive, Apple’s iCloud or other cloud services that sync automatically when files are moved or changed within. For this particular “TruTorial” we’re going to set it up to use a SkyDrive folder we created called Skype Received Files.
First, we’ll create the folder in the SkyDrive root directory:
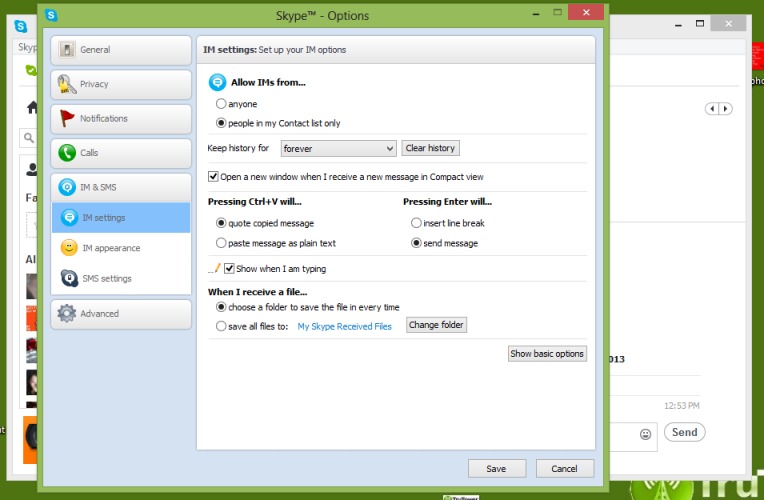
Now that the folder is created, we can set it up as the default save folder for all files received through Skype. To do this, access the Tools menu and click on Options to bring up the Skype Options menu. Next, click on the IM & SMS option on the left sidebar. Then click on Advanced Options. You should see a menu like the one below.
Finally, hit the Change Folder button under the header that says “When I receive a file…” and find the folder you just created (or another folder of your choosing). We’ve selected our Skype Received Files folder. Finally, click the Save button at the bottom.
Your files will now all move to the selected folder. If you’ve set your SkyDrive up and created a folder for these files like we’ve done in this tutorial, you’ll also benefit from having any files you receive automatically backed up; this also makes them accessible from any device, provided you have the appropriate applications installed and a connection to the internet.


